Create Webhook
General Configuration
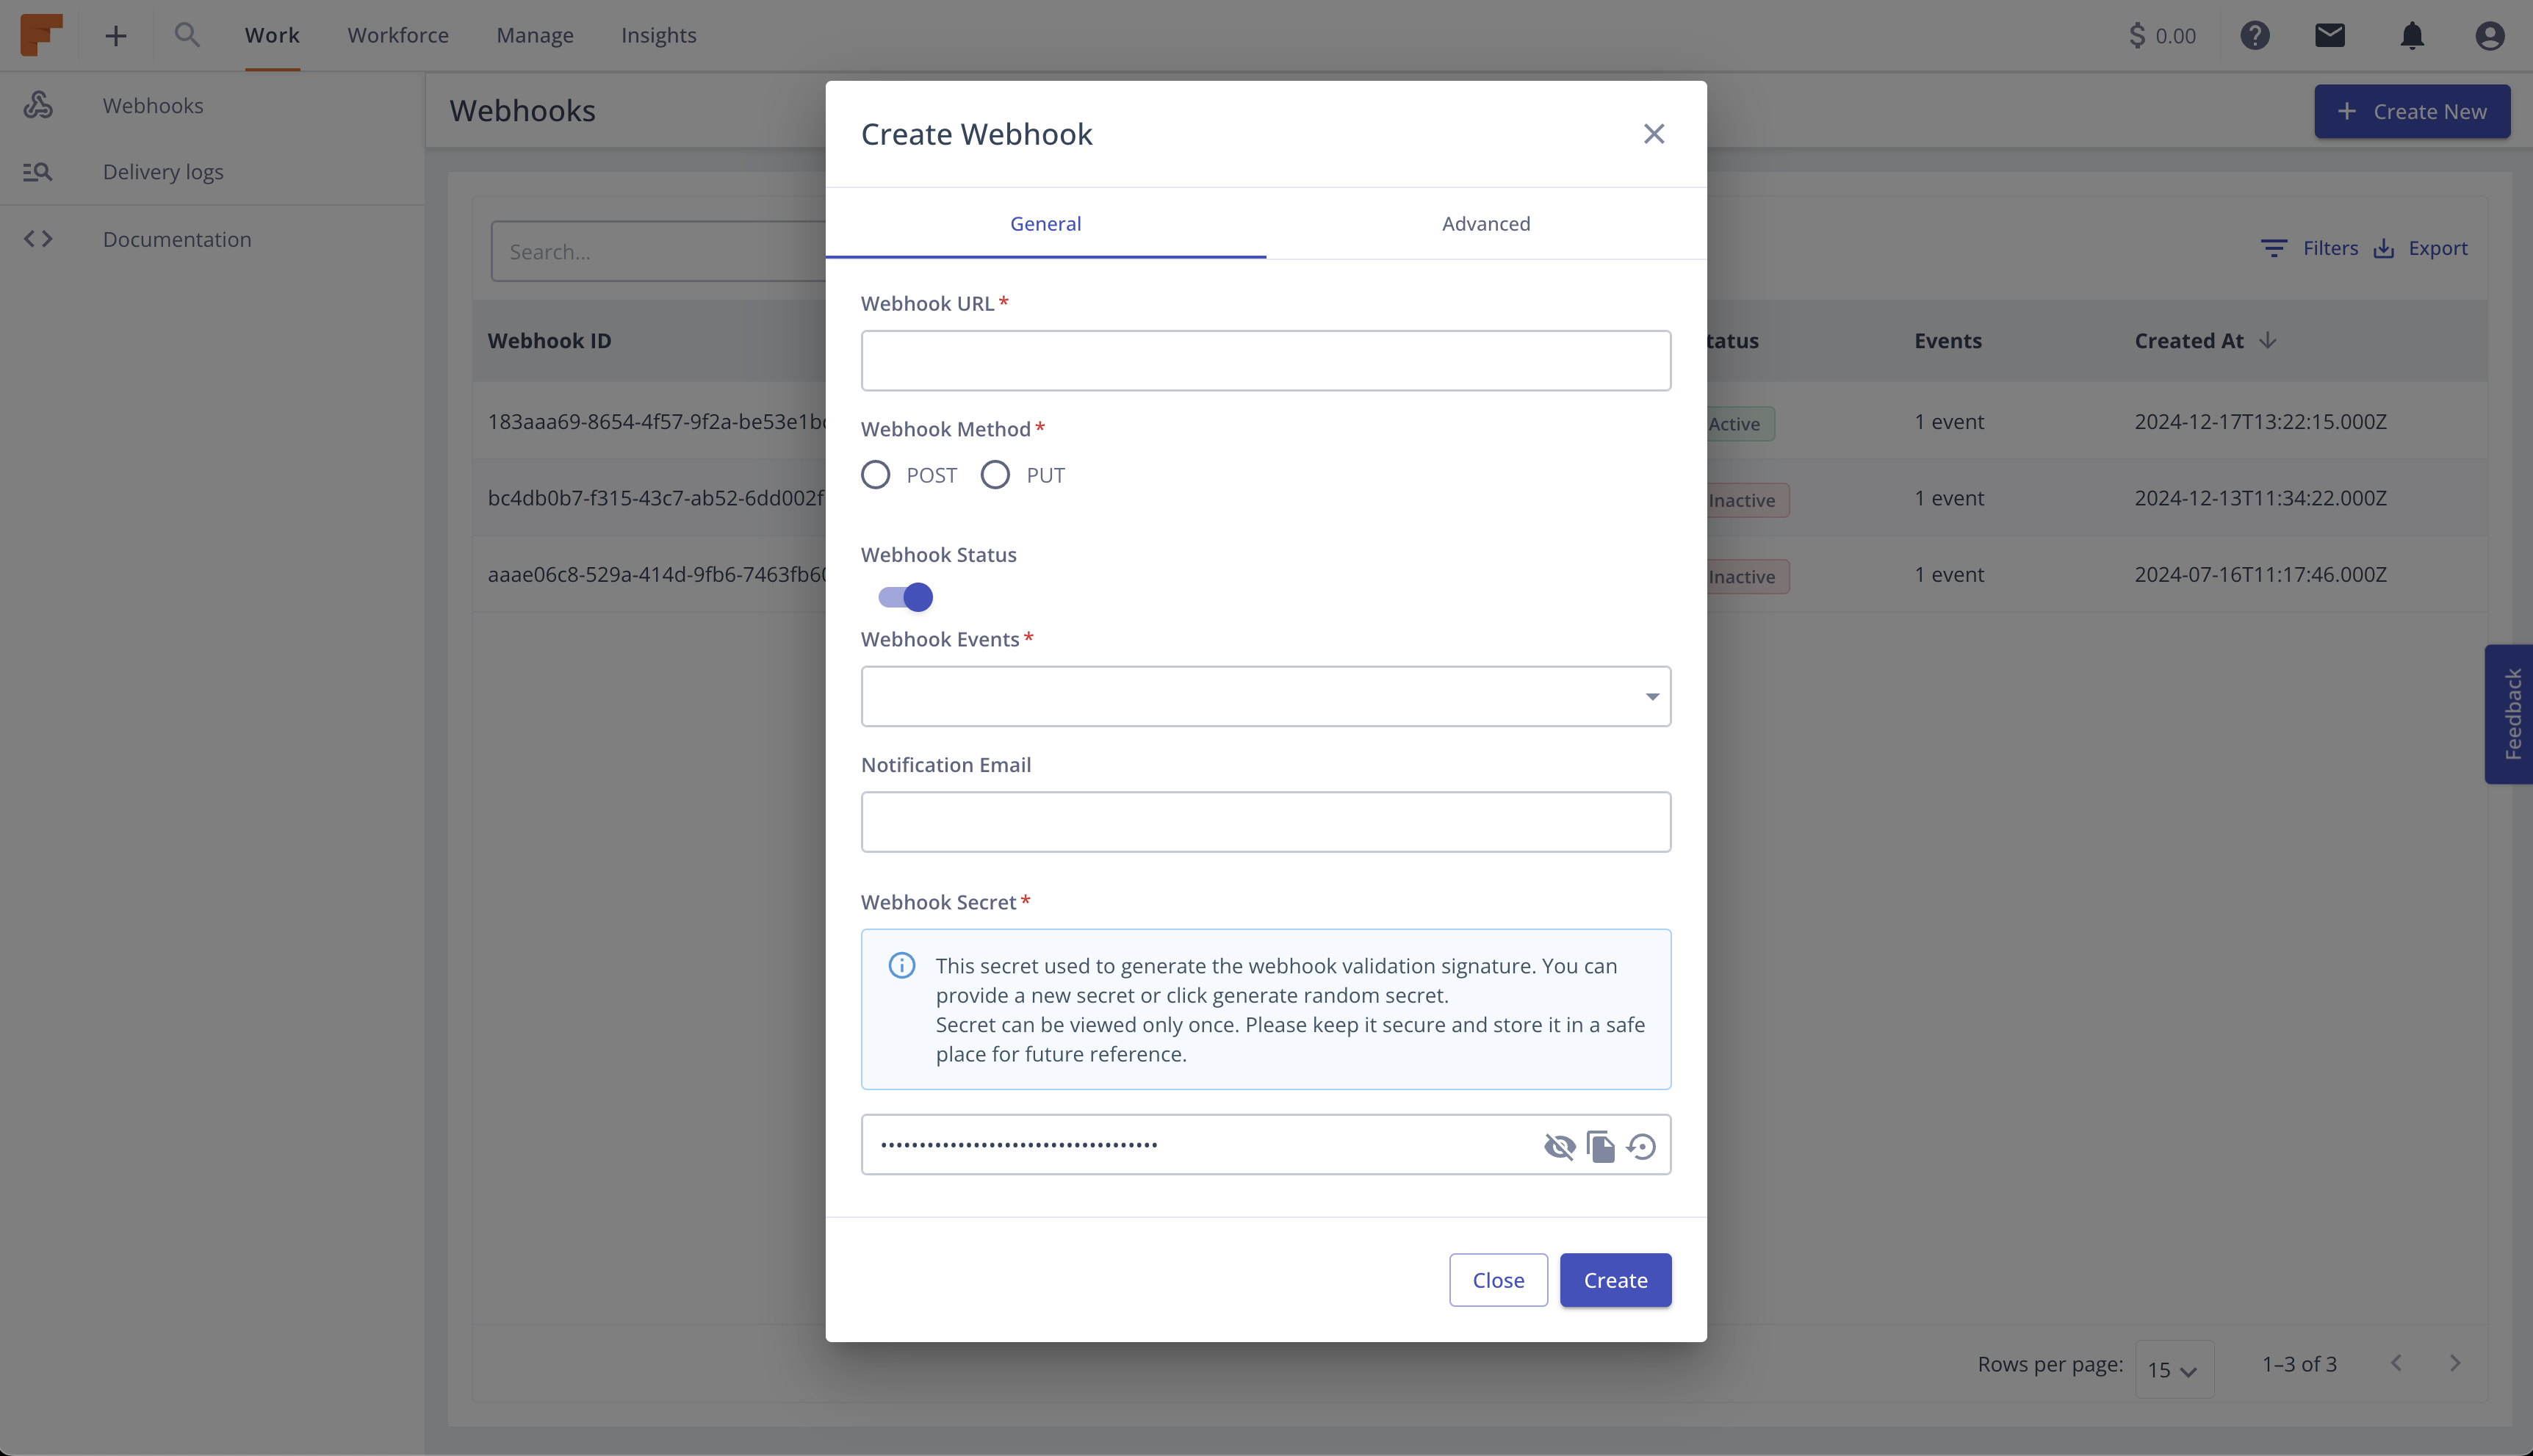
To create your Webhooks, follow these steps within the Dashboard:
- Navigate to Integrations > Webhooks.
- Click on the
Create Newbutton. - Provide your endpoint URL and Request Method (POST or PUT). POST is the default method.
- Select the
Eventsyou want to get updated for. See the Events for list of available events. - Toggle the
Webhook Statusbutton to Enable the Webhook right after creating. Or you can enable it later. - Type your
Emailwhere you would like ot get notification about any error related to your Webhook. It can be multiple emails separated by comma. - For the
Webhook Secretyou can provide a custom secret or generate a random secret. Take a look at Securing Webhooks for more detail. - Once finished, click the
Createbutton to finalize your Webhook setup.
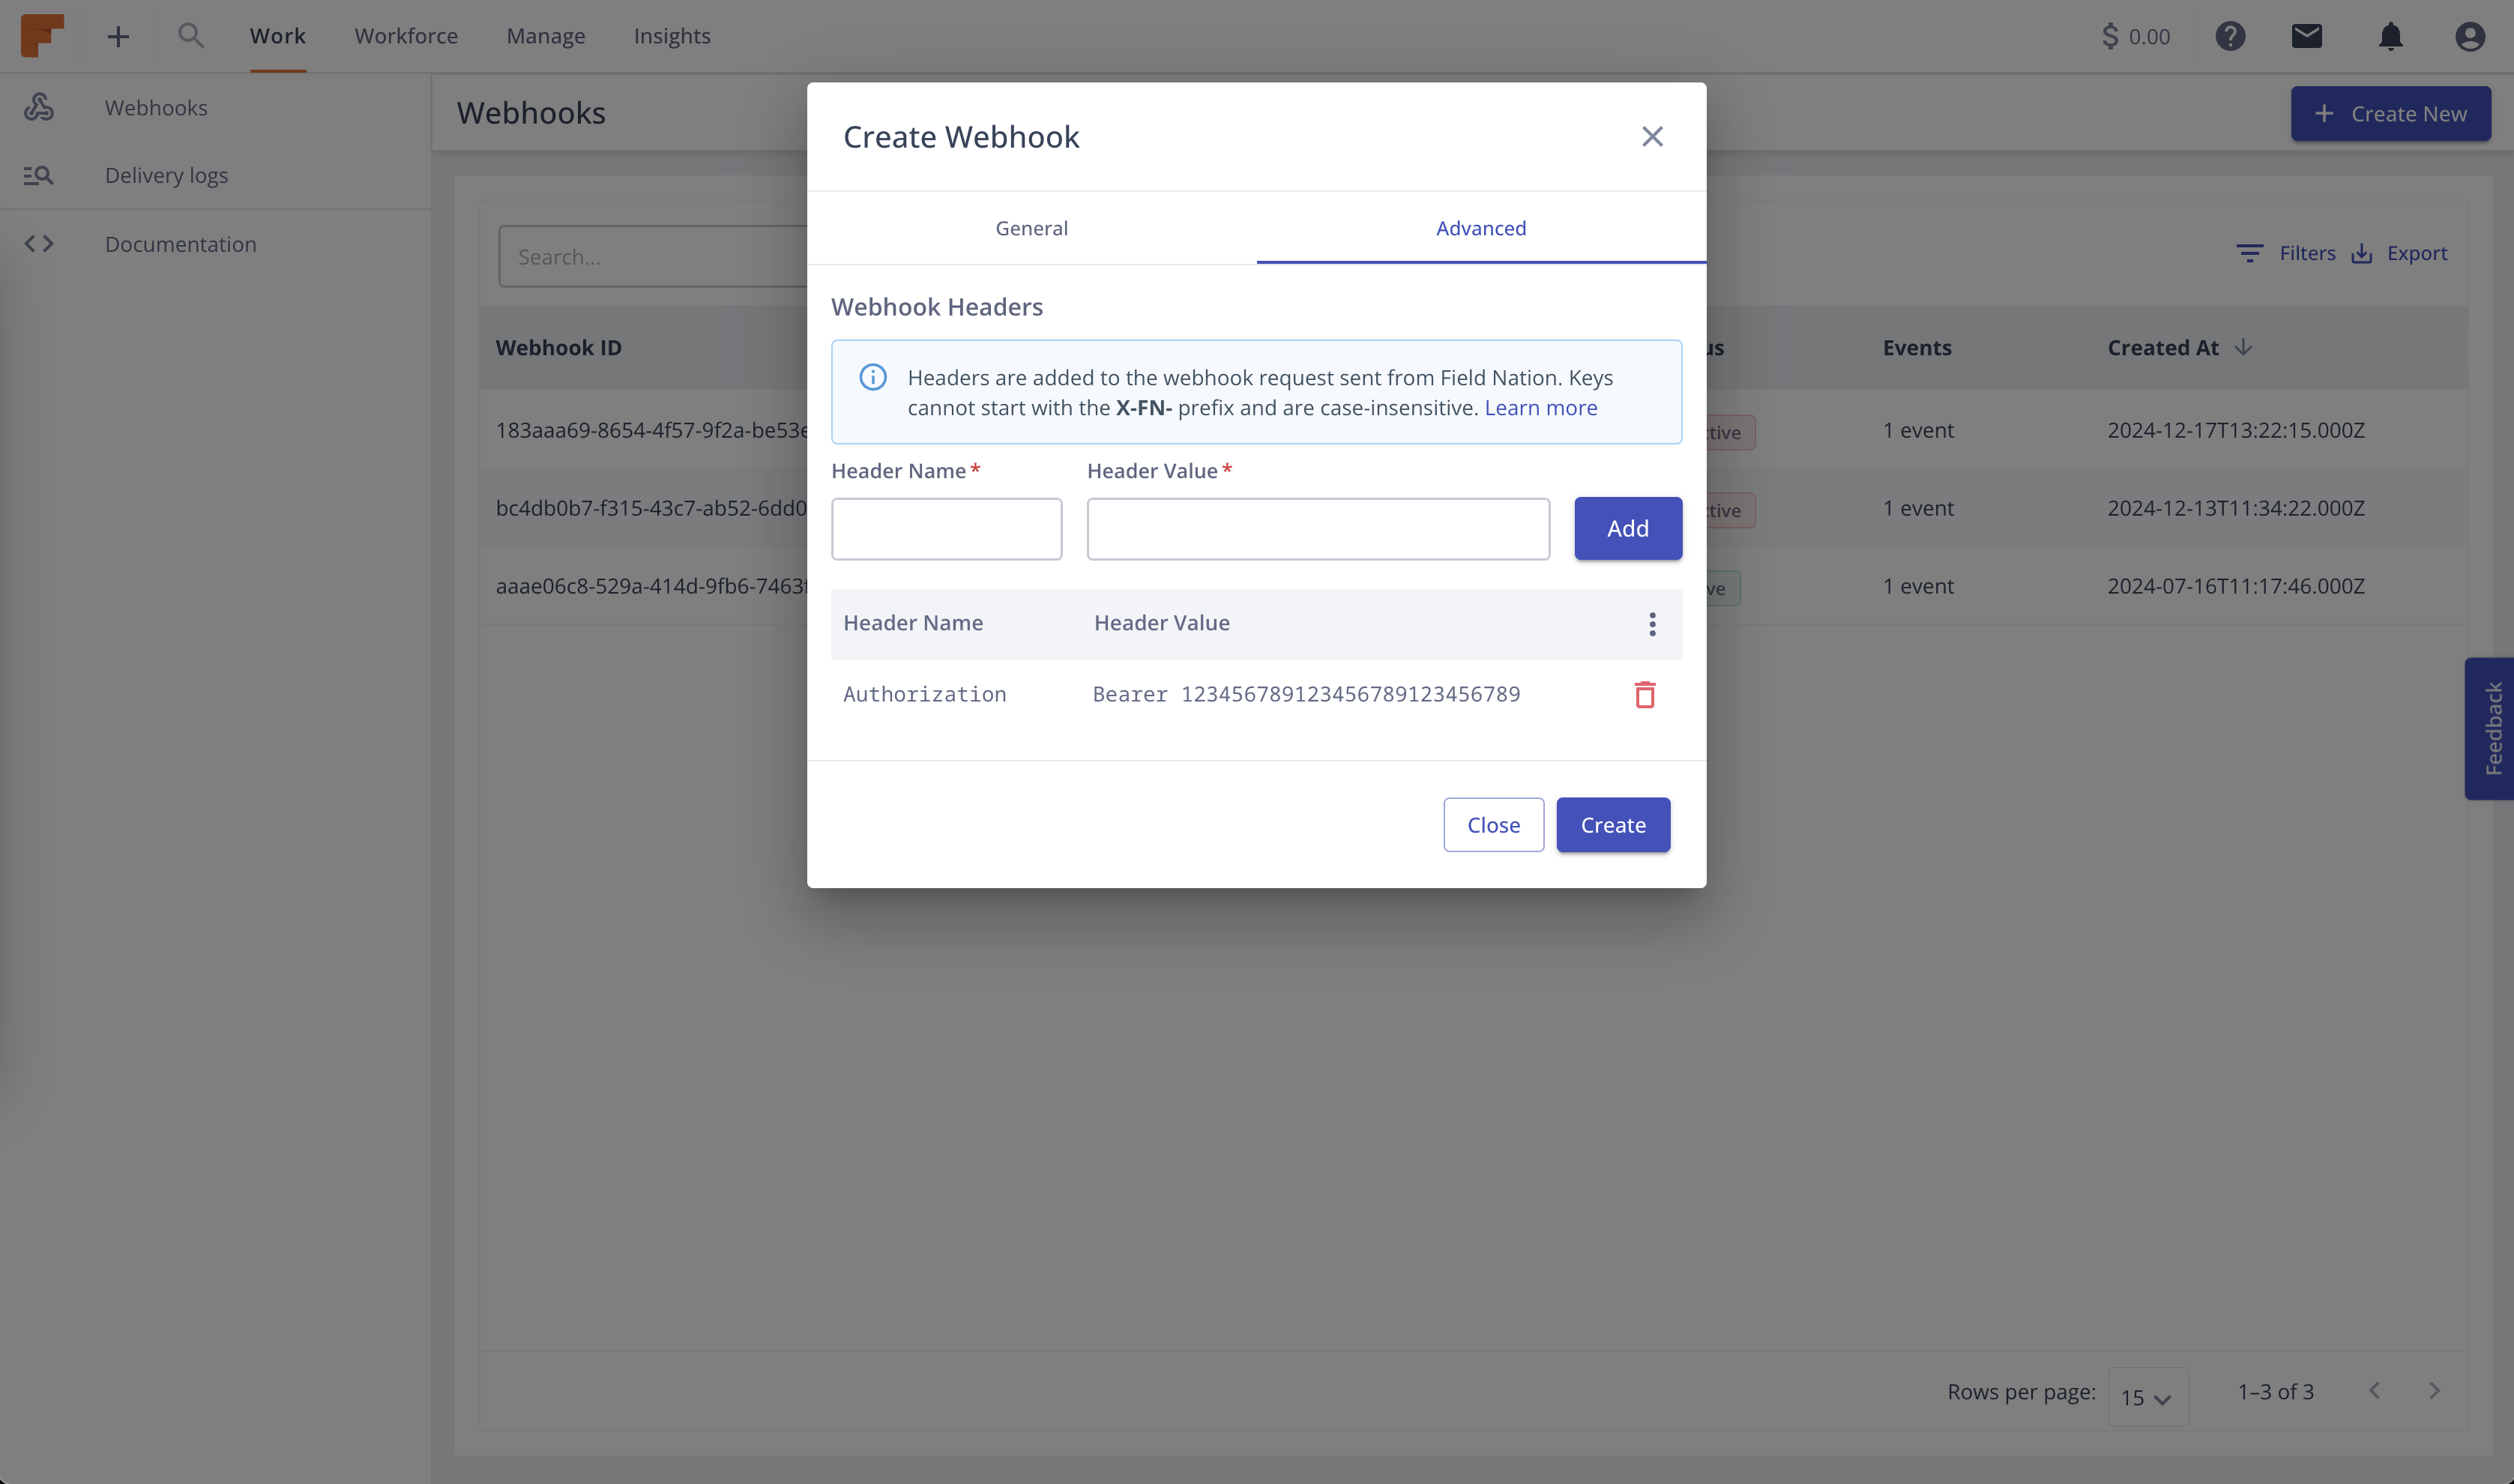
Advanced Configuration
There are additional configuration to the webhooks.
- To add custom headers, Click on the advanced tab and insert the header key and value, then click Add. Read more about custom headers here.